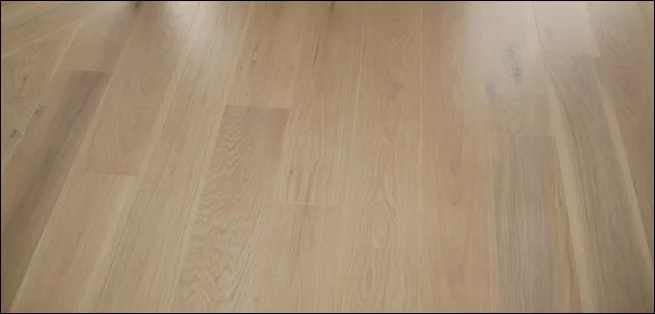
If you are thinking about a wooden floor or just installing a new door in your room, white oak wood should be your very first choice. Yes, people will say that oak wood is expensive, but it’s also a great value for money.
Oakwood is durable and strong because it is considered hardwood. It also resists fungus very well.
But the wood alone won’t be able to handle all the pressure throughout the upcoming years. You need to apply a finish on top of it to make it stronger.
It is completely up to you which finish going for. Since this guide is about white oak clear finish, we will be talking about this particular finish and how you can apply it.
How To Apply Clear Finish For White Oak?
Estimated Cost
The price may vary depending on how big of an area you have to cover. If it’s just a door, you may be able to get away with 1 bottle of clear coat, but if it’s a floor, we can’t clearly say. So check your local hardware store for prices.
Time Needed
Again, if it’s a door or a small wooden piece, you can finish the process within 15 to 30 minutes, but if it’s a floor, it will require hours.
Tools And Materials Needed
Now let’s look at the tools and materials we will need to get a clear finish on our white oak wood.
- Polyurethane clear finish.
- 80, 100, 120, 150, 180, 220 and 320 grit sandpapers.
- Lint-free cloth.
- Natural bristle brush.
- Mineral spirits.
- Sanding machine (optional).
- Tack rag.
If you have all these, great, we can immediately start the process, but if you don’t, talk to your local hardware store and buy these items.
Steps On Applying White Oak Clear Finish

Now let’s see how we can achieve a clear finish on white oak.
Step 1 – Using Sandpaper
You might be surprised to know that the application is very easy, but the hard part is making the wood ready for a clear finish.
Sanding the wood down is the first and the most important step in the whole process, and if you screw this up, the results will be horrible.
As we have said, the key to any finish is surface preparation. You have to start with 80 grit sandpaper and move up gradually.
Like 80 grit, then 100 grit, then 120 grit. You can go as high as you want, but 320 grit should be the bare minimum. Please do not skip any of them.
You can use a sander machine to save time and speed up the process, but that’s up to you. Move the sandpaper slowly throughout the surface. About 1 inch every second.
Moving too fast will not save you time because the finish will be poor, and you will have to do it again anyway.
Step 2 – In Search For Glue Spots
After you have used all the sandpapers and are confident that the surface is smooth enough, you have to look for glue spots. This will tell you if you need to sand the oak more.
Using lint-free cloth is important because it won’t leave any cloth material behind. Pour a few mineral spirits and wipe the whole oak.
If you find any glue spots, sand it down using 80 grit sandpaper and move up high. Now we are almost finished.
Step 3 – Preparing The White Oak
Once you are finished smoothing out the oak wood, you have to ensure no residue is left on the surface. Even if there is a small amount left, the clear finish won’t be so clear.
Take a tack rag and wipe the entire surface properly. Do it two or three times just to ensure a clean surface.
In the meantime, clean your surroundings as well. Use a vacuum cleaner to suck up all the residue near the oak wood.
Step 4 – Applying The Clear Finish
Buy whichever clear finish your local store recommends. One thing to remember, although it is a clear finish, your white oak will get a bit dark after the coating, but not noticeably dark. Just a heads up.
Now dip your natural bristle brush in the clear coat and start with one end of the wood. Use long, even, and solid strokes. Don’t pool up or flood any area with the coat.
Make it as flat as possible. Smooth out if you notice any drips. After covering the whole white oak wood, leave it to dry for at least 24 hours before applying the second coat.
If you are thinking of only applying two coats, then use very fine-grit sandpaper to gently smooth out the oak wood before applying the second one. Follow the exact things you did the first time and leave it for 24 hours.
But, if you plan to apply three coats, sanding the white oak in the second coat is unnecessary. Do it in the third coating. Remember, the more coating, the better durability, and longevity.
Step 5 – For People Who Want To Use An Oil-Based Coat
If you use an oil-based clear coat, you have to dispose of the oily clothes or rags properly. Layout the clothes in a flat manner and let them dry. They can combust if not dried up properly.
Well, after you have done this, you are all done.
Final words
The popularity of oak wood can’t be denied. Yes, oak wood is expensive, but it is very reasonable if you compare it to other hardwoods. And this is exactly why it is so loved.
If you prefer the whiteness of your white oak, there is no other alternative to a clear/natural finish because this is the only one that can keep the color of your wood as original as possible. Other finishes will only make it darker.
So, now that you know about the white oak clear finish and how you can apply it, we hope you’ll be able to achieve a clear and natural look within days.

