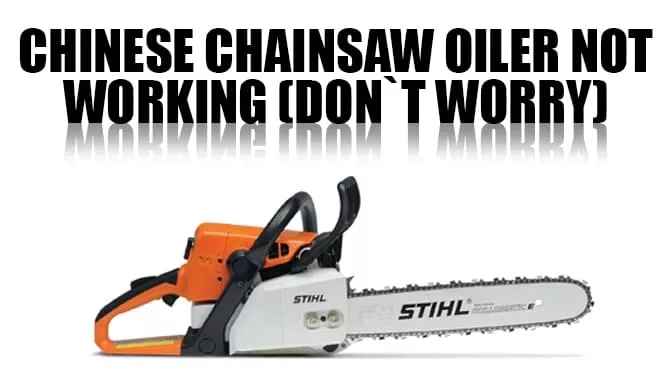
People tend to be a little bit harsh on Chinese products. While it may be right or wrong depending on the product, if your Chinese chainsaw oiler not working properly, the chances are that the whole chainsaw is not the problem.
So, please don’t blame it. Anyone who uses a chainsaw knows how crucial oil is for the bar and chain.
Without it, your chain will get damaged sooner than you think. So, if you tasted and found out that there is no oil on your chain, it is time to take immediate action.
In this guide, we will guide you step-by-step on fixing a Chinese chainsaw oil that is not working. But, it is not limited to only Chinese chainsaws. You can apply it on other chainsaws as well.
Fix Chinese Chainsaw Oiler Not Working
Estimated Cost
You will have to buy at least one part, which will cost you 20 dollars.
If the need arises, you might need to buy a second part which will also cost 20 dollars. So we recommend having 40 dollars in your pocket before trying out our tutorial.
Time Needed
In contrast to the cost, the time needed to fix your chainsaw oiler is a lot less. You can successfully fix your Chinese chainsaw oiler within 10 to 15 minutes. Well, 20 minutes max.
Tools and Materials Needed
Now let’s see what tools and materials we will need to make the Chinese chainsaw oiler work again.
- A ratchet and socket.
- A new clutch drum.
- A new worm gear.
Yes, that’s pretty much all the things you need. Considering how big the problem is, the tools and materials required are so little. So, if you have all of these, let’s jump right in.
Fixing Chinese Chainsaw Oiler Not Working – 5 Steps
Here are the steps you need to follow –
Step 1 – Taking The Bar And Chain Off
The first and obvious thing you have to do is remove the bar and chain from the chainsaw. To do this, get your ratchet and socket and remove the two nuts holding the bar cover. Remove them by rotating the ratchet counterclockwise.
Once you are done removing the two nuts, gently take off the bar cover or clutch cover. You might want to place the chainsaw as if the bar and chain are facing upwards. This will help you easily remove them.
Now, lift the bar and chain. If the area is dirty, clean it thoroughly before moving forward. Now, to check it for the last time, start the chainsaw and check whether oil is coming out of the oil hole or not. If not, you should move to step two.
Step 2 – Working On The Clutch Side
If every other side looks okay, it is time to work on the clutch side where the oil pump is. We have to start by taking off the clutch drum.
To take it off, you have to remove the little metal clip on the top. It’s best to keep your finger on the clip while removing it because it tends to fly off.
The plate beneath the clip is going to come off. Now the clutch drum can be lifted easily. Right under the clutch drum, there should be a roller bearing. Remove it and move forward.
And now, to take the clutch off, you can either use an impact driver with a 19-millimeter socket or a ratchet/wrench.
We recommend doing it manually with the ratchet and socket because it is safer. Whichever way you go, remember to turn it clockwise. Behind the clutch, there is a plate.
Now you can see who the real culprit is. 90% of the time, the worm gear is responsible for oilers not working.
Step 3 – Replacing The Worm Gear
The worm gear will always look like it is okay. It is all intact and rotating just fine. But once you remove it and take a close look, you will see the problem.
The main issue is that the metal rod on the plastic worm gear starts to move/rotate independently.
So if your worm gear is like this, the metal rod will turn, but it won’t be able to turn the warm gear to make the oil pump work.
All you have to do is replace the old worm gear with a new one. But remember to get the exact model of the worm gear your chainsaw supports.
Buying the OEM variant from the manufacturer’s website is the best way to go. Don’t go for cheap aftermarket Chinese ones.
Installing the worm gear is pretty straightforward. All you have to do is place it and check whether it rotates smoothly or not. If yes, move to step four.
Step 4 – Putting Everything Back Together
Remember the order of the parts you removed because the chainsaw might get damaged if you place any plate incorrectly. So after you’re done installing the new worm gear, put everything back in order.
The order is worm gear > metal plate > clutch > clutch bearing > clutch drum > sprocket > washer > metal clip.
Remember to tighten up the clutch counterclockwise with a ratchet and socket. Don’t tighten it up too much, though. After that, put some grease on your clutch bearing.
If your clutch drum has worn out, you can buy a new one and replace it. But, if it’s working fine, you can skip this part and finish the whole process for under 20 dollars.
Now, you can finally put the clutch drum back on. You must line up the small hole to the arm (metal rod) of the oiler worm gear.
You will need a flashlight to locate the arm and once you find it, place it so that the hole fits right into the arm. To check if it’s working, give the clutch drum a spin and check whether the arm is spinning with it or not.
Now put the sprocket and the washer back. After that, secure everything with the metal clip. Now the only thing that remains is testing if the oiler is working or not.
Step 5 – Checking The Oiler
After you’re done installing the clutch drum, don’t put the chain and bar back already. Place your chainsaw on a flat surface, put a sufficient amount of oil inside the oil tank, and turn on the chainsaw.
Now you should be able to see oil coming out of the oil outlet. Please do not rev up the chainsaw before putting the bar and chain back on. If you rev it up too high, the clutch can come apart and get damaged.
Once you are done finishing the checking, you can put the bar and chain back on. After that, put the bar cover back and secure it with the two nuts. Use the ratchet and socket and rotate the nuts counterclockwise to put them back together.
Now for the final test, put a piece of wood on a surface. Start your chainsaw and rev it up high.
Hold the chainsaw close up against the wood without touching it. If you see oil splatter on the side of the wood, you are all good to go.
Final words
Oil is what keeps the bar and chain on your chainsaw alive. It protects the edges and dissipates heat. Without the oil, no matter how technologically advanced or expensive your chainsaw is, it won’t last long.
Whether you have a Chinese chainsaw or a branded chainsaw, 90% of the time, it’s the fault of that tiny worm gear.
It is a matter of concern that manufacturers don’t make these parts long-lasting and durable. And at the same time, it is funny that such a tiny part can cause such a big issue.
Lastly, you should always replace your Chinese or any chainsaw oiler parts with OEM ones instead of third-party aftermarket ones. The OEM parts are far better. Hope you got the solution on Chinese chainsaw oiler not working.

